 Quarkus Azure Services Extensions
Quarkus Azure App Configuration Extension
Quarkus Azure Services Extensions are developed and supported by Microsoft as part of their commitment to Open Standard Enterprise Java. For more information, see Jakarta EE on Azure.
Azure App Configuration is a fast, scalable parameter storage for app configuration.
This extension allows to inject a io.smallrye.config.SmallRyeConfig object inside your Quarkus application so you can access the app configuration stored in Azure.
Installation
If you want to use this extension, you need to add the io.quarkiverse.azureservices:quarkus-azure-services extension first to your build file.
For instance, with Maven, add the following dependency to your POM file:
<dependency>
    <groupId>io.quarkiverse.azureservices</groupId>
    <artifactId>quarkus-azure-app-configuration</artifactId>
    <version>1.0.2</version>
</dependency>
How to Use It
Once you have added the extension to your project, follow the next steps, so you can inject io.smallrye.config.SmallRyeConfig object in your application to store and read blobs.
Setup your Azure Environment
First thing first.
For this sample to work, you need to have an Azure account as well as Azure CLI installed.
The Azure CLI is available to install in Windows, macOS and Linux environments.
Checkout the installation guide.
Then, you need an Azure subscription and log into it by using the az login command.
You can run az version to find the version and az upgrade to upgrade to the latest version.
Create an Azure resource group with the az group create command. A resource group is a logical container into which Azure resources are deployed and managed.
az group create \
    --name rg-quarkus-azure-app-configuration \
    --location eastus
Create an Azure App Configuration store with the following command:
az appconfig create \
    --name appcs-quarkus-azure-app-configuration \
    --resource-group rg-quarkus-azure-app-configuration \
    --location eastus
Then create some key-value properties with the following commands:
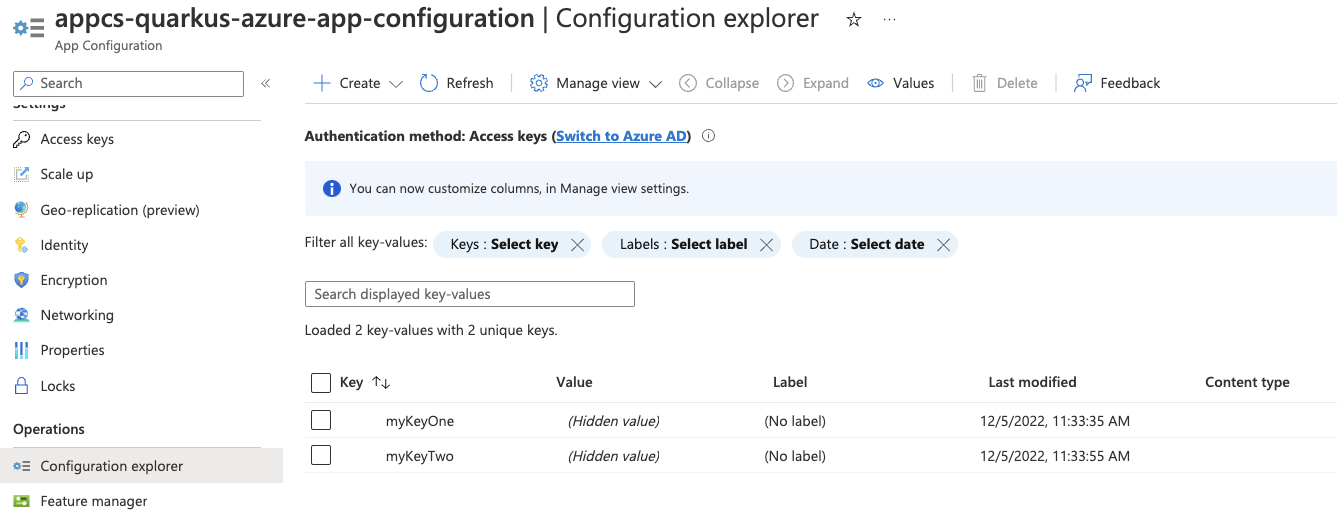
az appconfig kv set --name appcs-quarkus-azure-app-configuration --yes --key myKeyOne --value "Value 1"
az appconfig kv set --name appcs-quarkus-azure-app-configuration --yes --key myKeyTwo --value "Value 2"
You can list the key-value properties with the following command:
az appconfig kv list --name appcs-quarkus-azure-app-configurationIf you log into the Azure portal, you can see the resource group and the key-value you created.
Configure the Azure App Configuration Client
As you can see below in the Configuration Reference section, this extension has several configuration options. To be able to connect to the Azure App Configuration that we’ve just created, you must get the URL of the endpoing, it’s id and secret. For that, execute the following Azure CLI command:
az appconfig credential list --name appcs-quarkus-azure-app-configurationYou’ll get the following output:
{
  "connectionString": "Endpoint=https://appcs-quarkus-azure-app-configuration.azconfig.io;Id=xxxxxx;Secret=xxxxxx",
  "id": "xxxxxx",
  "name": "Primary",
  "readOnly": false,
  "value": "xxxxxx"
}
Then, in the application.properties file, add the following property according to the output of the previous command:
quarkus.azure.app.configuration.endpoint=https://appcs-quarkus-azure-app-configuration.azconfig.io
quarkus.azure.app.configuration.id=xxxxxx
quarkus.azure.app.configuration.secret=xxxxxx
Inject the SmallRyeConfig
Now that your Azure environment is ready and that you have configured the extension, you can inject the SmallRyeConfig object in your application, so you can interact with Azure App Configuration.
@Path("/config")
@Produces(MediaType.APPLICATION_JSON)
public class ConfigResource {

  @Inject
  SmallRyeConfig config;

  @GET
  @Path("/{name}")
  public Response configValue(@PathParam("name") final String name) {
      return Response.ok(config.getConfigValue(name)).build();
  }
}
To execute this sample you can run the following cURL commands:
-
curl -X GET localhost:8080/config/myKeyOne -
curl -X GET localhost:8080/config/myKeyTwo
Extension Configuration Reference
Configuration property fixed at build time - All other configuration properties are overridable at runtime
Type |
Default |
|
|---|---|---|
The endpoint of the app configuration Environment variable: |
string |
required |
The id of the app configuration Environment variable: |
string |
required |
The secret of the app configuration Environment variable: |
string |
required |
The label filter of the app configuration. Use comma as separator for multiple label names Environment variable: |
string |
Quarkus Azure Blob Storage Extension
Quarkus Azure Services Extensions are developed and supported by Microsoft as part of their commitment to Open Standard Enterprise Java. For more information, see Jakarta EE on Azure.
Azure Blob Storage is a massively scalable and secure object storage for cloud-native workloads, archives, data lakes, high-performance computing, and machine learning.
This extension allows you to store and retrieve blobs from Azure Blob Storage by injecting a com.azure.storage.blob.BlobServiceClient object inside your Quarkus application.
Installation
If you want to use this extension, you need to add the io.quarkiverse.azureservices:quarkus-azure-services extension first to your build file.
For instance, with Maven, add the following dependency to your POM file:
<dependency>
    <groupId>io.quarkiverse.azureservices</groupId>
    <artifactId>quarkus-azure-storage-blob</artifactId>
    <version>1.0.2</version>
</dependency>
How to Use It
Once you have added the extension to your project, follow the next steps, so you can inject com.azure.storage.blob.BlobServiceClient object in your application to store and read blobs.
Setup your Azure Environment
First thing first.
For this sample to work, you need to have an Azure account as well as Azure CLI installed.
The Azure CLI is available to install in Windows, macOS and Linux environments.
Checkout the installation guide.
Then, you need an Azure subscription and log into it by using the az login command.
You can run az version to find the version and az upgrade to upgrade to the latest version.
Create an Azure resource group with the az group create command. A resource group is a logical container into which Azure resources are deployed and managed.
az group create \
    --name rg-quarkus-azure-storage-blob \
    --location eastus
Create a general-purpose storage account with the following command:
az storage account create \
    --name stquarkusazurestorageblo \
    --resource-group rg-quarkus-azure-storage-blob \
    --location eastus \
    --sku Standard_ZRS \
    --encryption-services blob
Blobs are always uploaded into a container. You can organize groups of blobs in containers similar to the way you organize your files on your computer in folders. The following command uses your Azure AD account to authorize the operation to create the container. Before you create the container, assign the Storage Blob Data Contributor role to yourself. Even if you are the account owner, you need explicit permissions to perform data operations against the storage account. For that, get your subscription id with:
az account show \
    --query id
Then, assign the role to yourself with (change <subscription> with your subscription id):
az ad signed-in-user show --query id -o tsv | az role assignment create \
--role "Storage Blob Data Contributor" \
--assignee @- \
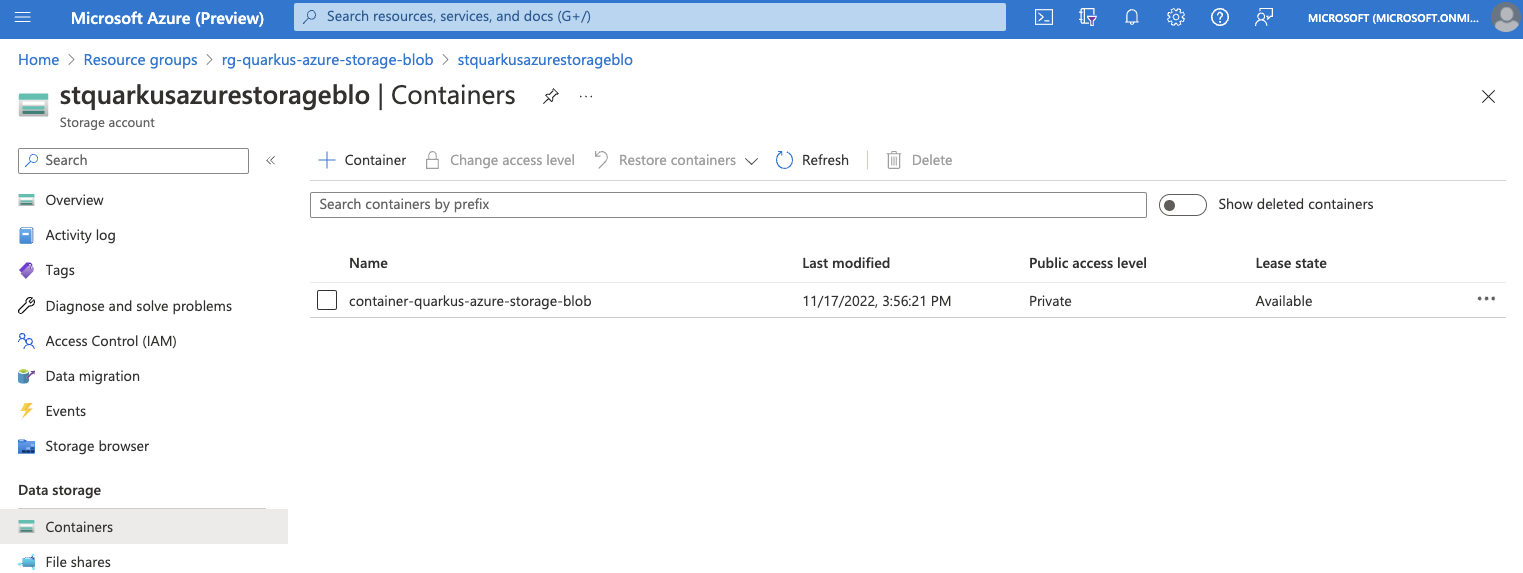
--scope "/subscriptions/<subscription>/resourceGroups/rg-quarkus-azure-storage-blob/providers/Microsoft.Storage/storageAccounts/stquarkusazurestorageblo"az storage container create \
--account-name stquarkusazurestorageblo \
--name container-quarkus-azure-storage-blob \
--auth-mode loginIf you log into the Azure portal, you can see the resource group and the storage account you created.
Configure the Azure Storage Blob Client
As you can see below in the Configuration Reference section, this extension has several configuration options.
But one of them is mandatory, and that is the quarkus.azure.storage.blob.connection-string.
To get the connection string, execute the following Azure CLI command:
az storage account show-connection-string \
    --resource-group rg-quarkus-azure-storage-blob \
    --name stquarkusazurestorageblo \
    --output tsv
Then, in the application.properties file, add the following property:
quarkus.azure.storage.blob.connection-string=DefaultEndpointsProtocol=https;EndpointSuffix=core.windows.net;AccountName=stquarkusazurestorageblo;AccountKey=xxxxxxx==;BlobEndpoint=https://stquarkusazurestorageblo.blob.core.windows.net/;FileEndpoint=https://stquarkusazurestorageblo.file.core.windows.net/;QueueEndpoint=https://stquarkusazurestorageblo.queue.core.windows.net/;TableEndpoint=https://stquarkusazurestorageblo.table.core.windows.net/Inject the Azure Storage Blob Client
Now that your Azure environment is ready and that you have configured the extension, you can inject the com.azure.storage.blob.BlobServiceClient object in your application, so you can interact with Azure Blob Storage.
The uploadBlob method first gets the container that we’ve created (`container-quarkus-azure-storage-blob), sets some text to a text file, and then uploads the text to the container.
The `downloadBlob method downloads the text file from the container and prints the text to the console.
To execute this sample you can run the following cURL commands:
-
curl -X POST localhost:8080/quarkus-azure-storage-blob -
curl localhost:8080/quarkus-azure-storage-blob
@Path("/quarkus-azure-storage-blob")
@ApplicationScoped
public class StorageBlobResource {
@Inject
BlobServiceClient blobServiceClient;
@POST
public Response uploadBlob() {
BlobContainerClient blobContainerClient = blobServiceClient
.createBlobContainerIfNotExists("container-quarkus-azure-storage-blob");
BlobClient blobClient = blobContainerClient.getBlobClient("quarkus-azure-storage-blob.txt");
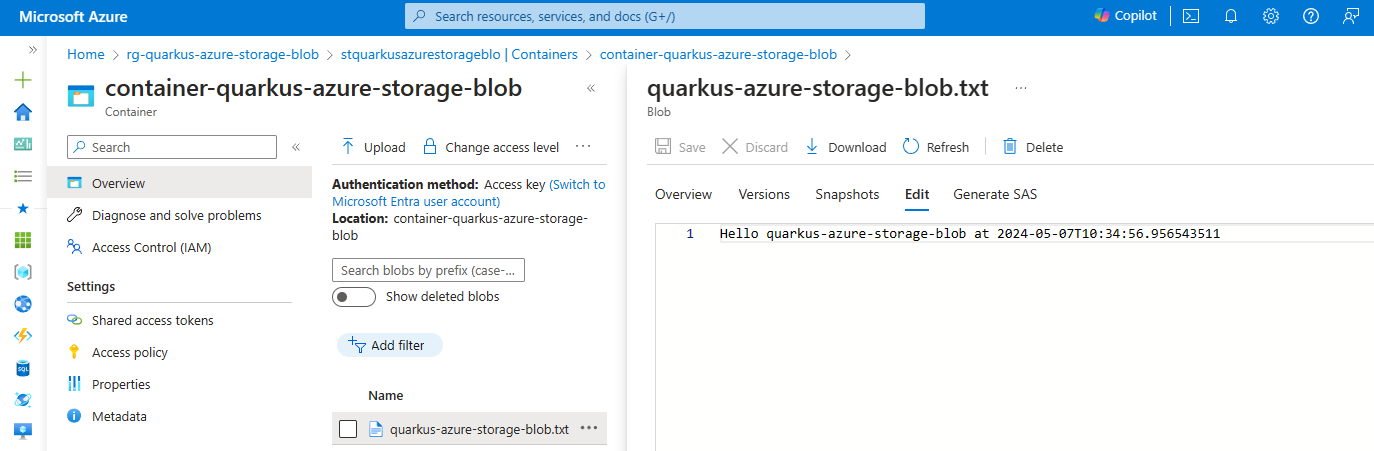
blobClient.upload(BinaryData.fromString("Hello quarkus-azure-storage-blob at " + LocalDateTime.now()), true);
return Response.status(CREATED).build();
}
@GET
public String downloadBlob() {
BlobContainerClient blobContainerClient = blobServiceClient
.createBlobContainerIfNotExists("container-quarkus-azure-storage-blob");
BlobClient blobClient = blobContainerClient.getBlobClient("quarkus-azure-storage-blob.txt");
return blobClient.downloadContent().toString();
}
}You can go back to the Azure portal and see the container and the blob that you’ve created.
Reactive code pitfall
In case you plan to use BlobServiceClient (that provides all other clients for interacting with Azure BlobStore), note that it cannot be used within the reactive code as it blocks the event loop due to the fact that BlobServiceClient is a wrapper around the BlobServiceAsyncClient and it uses blocking calls such as blockingGet.
Using it in reactive code such as RestEasy Reactive or Reactive Messaging will cause indefinite hang of the application that prevents it from further functioning or shutdown.
Extension Configuration Reference
Configuration property fixed at build time - All other configuration properties are overridable at runtime
Type |
Default |
|
|---|---|---|
Whether a health check is published in case the smallrye-health extension is present. Environment variable: |
boolean |
|
If DevServices has been explicitly enabled or disabled. DevServices is generally enabled by default, unless there is an existing configuration present. When DevServices is enabled Quarkus will attempt to automatically configure and start an azurite instance when running in Dev or Test mode and when Docker is running. Environment variable: |
boolean |
|
The container image name to use, for container based DevServices providers. Environment variable: |
string |
|
Optional fixed port the Dev services will listen to. If not defined, the port will be chosen randomly. Environment variable: |
int |
|
Indicates if the azurite instance managed by Quarkus Dev Services is shared. When shared, Quarkus looks for running containers using label-based service discovery. If a matching container is found, it is used, and so a second one is not started. Otherwise, Dev Services for Azure Storage Blob starts a new container. The discovery uses the Container sharing is only used in dev mode. Environment variable: |
boolean |
|
The value of the This property is used when you need multiple shared azurite instances. Environment variable: |
string |
|
The connection string of Azure Storage Account. Environment variable: |
string |
required |